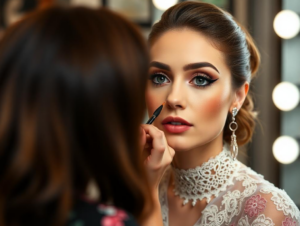
Essential Makeup Tips and Tricks for a Flawless Look
5 Must-Know Foundation Hacks for a Flawless Base
When it comes to achieving a flawless makeup look, the foundation is the key. It serves as the base for all other makeup products and can make or break your overall look. However, applying foundation can be a tricky task, and even the slightest mistake can ruin your entire makeup look. But fear not, as we have compiled a list of 5 must-know foundation hacks that will help you achieve a flawless base every time.
1. Prep your skin before applying foundation
The first and most crucial step to achieving a flawless base is to prep your skin. This means cleansing, toning, and moisturizing your skin before applying any makeup. This will not only help your foundation glide on smoothly but also ensure that it stays put throughout the day. Make sure to choose a moisturizer that suits your skin type and allows it to absorb fully before moving on to the next step.
2. Use a primer
Primer is a game-changer when it comes to achieving a flawless base. It not only helps to smooth out any imperfections on your skin but also helps your foundation last longer. Choose a primer that suits your skin type and concerns. For example, if you have oily skin, opt for a mattifying primer, and if you have dry skin, go for a hydrating one. Apply a small amount of primer all over your face, focusing on areas where your makeup tends to fade or crease.
3. Choose the right shade and formula
Choosing the right shade and formula of foundation is crucial for a flawless base. The wrong shade can make you look washed out or orange, while the wrong formula can make your skin look cakey or oily. When choosing a foundation, always test it on your jawline and make sure it matches your neck. Also, consider your skin type when choosing a formula. If you have oily skin, opt for a matte or oil-free foundation, and if you have dry skin, go for a hydrating or dewy formula.
4. Apply foundation with a damp sponge
One of the best ways to achieve a flawless base is by using a damp makeup sponge to apply your foundation. This will not only help to blend the foundation seamlessly into your skin but also give you a natural, airbrushed finish. Start by dampening your sponge with water and then squeezing out any excess. Then, dab the sponge onto your foundation and bounce it onto your skin, starting from the center of your face and working your way outwards.
5. Set your foundation with powder
Setting your foundation with powder is essential to ensure that it stays in place all day long. However, instead of using a powder brush, try using a damp makeup sponge to press the powder into your skin. This will help to set your foundation without disturbing it and give you a more natural finish. Make sure to only apply powder to areas where you tend to get oily, such as your T-zone, and leave the rest of your face powder-free for a more natural look.
In conclusion, achieving a flawless base is all about proper preparation, choosing the right products, and using the right techniques. By following these 5 must-know foundation hacks, you can achieve a flawless base every time and have your makeup looking flawless all day long. Remember to always prep your skin, use a primer, choose the right shade and formula, apply foundation with a damp sponge, and set it with powder for a flawless and long-lasting base.
The Power of Contouring: Tips and Tricks for a Defined Face

Makeup has the power to transform our appearance and enhance our features. One of the most popular techniques in makeup is contouring, which involves using different shades of makeup to create the illusion of a more defined and sculpted face. Whether you are a beginner or a makeup pro, mastering the art of contouring can take your makeup game to the next level. In this article, we will discuss some essential tips and tricks for achieving a flawless and defined face through contouring.
First and foremost, it is important to understand the concept of contouring. Contouring is all about creating shadows and highlights on your face to give it a more defined and chiseled look. The key is to use a darker shade to create shadows and a lighter shade to highlight the high points of your face. This technique can help to slim down your face, define your cheekbones, and even make your nose appear smaller.
The first step in contouring is to choose the right products. It is essential to use a matte bronzer or contour powder that is a few shades darker than your skin tone. Avoid using shimmery or glittery products as they can make your face look shiny and unnatural. For highlighting, opt for a concealer or highlighter that is a few shades lighter than your skin tone. Cream products work best for contouring as they blend seamlessly into the skin.
Next, it is crucial to know your face shape. Different face shapes require different contouring techniques. For example, if you have a round face, you would want to focus on creating more definition along the jawline and cheekbones. On the other hand, if you have a square face, you would want to soften the angles of your face by contouring along the temples and jawline. Knowing your face shape will help you to target the areas that need more definition.
When it comes to application, blending is key. Harsh lines and streaks can make your contour look unnatural and unflattering. Use a damp beauty sponge or a fluffy brush to blend out the contour and highlight. Start with a small amount of product and build it up gradually to avoid going overboard. Remember to blend in a back and forth motion to create a seamless and natural finish.
Another important tip is to choose the right shade for your skin tone. If you have fair skin, opt for a cool-toned contour shade, while those with medium to dark skin tones can go for warmer shades. It is also essential to consider your undertone when choosing a contour shade. If you have a warm undertone, go for a contour shade with a hint of red or orange, and if you have a cool undertone, opt for a contour shade with a hint of grey or taupe.
In addition to the traditional contouring technique, there are other ways to achieve a defined face. One popular method is the “3” technique, where you apply the contour in the shape of a “3” along the temples, under the cheekbones, and along the jawline. This technique helps to create a more natural and subtle contour. You can also use a contour stick or a cream contour palette for a more precise application.
Lastly, do not forget to set your contour with a powder. This will help to lock in the product and prevent it from smudging or fading throughout the day. Use a fluffy brush to lightly dust a translucent powder over your contour. This will also help to blend out any harsh lines and give your contour a more natural finish.
In conclusion, contouring is a powerful makeup technique that can help to define and sculpt your face. With the right products, techniques, and shades, you can achieve a flawless and chiseled look. Remember to blend, choose the right shade for your skin tone, and set your contour with powder for a long-lasting and natural finish. With these tips and tricks, you can master the art of contouring and take your makeup game to the next level.
10 Essential Makeup Brushes and How to Use Them for a Perfect Look
Makeup brushes are an essential tool for achieving a flawless makeup look. They come in various shapes and sizes, each designed for a specific purpose. However, with so many options available, it can be overwhelming to know which brushes to use and how to use them correctly. In this article, we will discuss the 10 essential makeup brushes and how to use them for a perfect look.
1. Foundation Brush
The foundation brush is a must-have for applying liquid or cream foundation. It has a flat, dense bristle head that helps to evenly distribute the product on the skin. To use this brush, start by applying small dots of foundation on your face and then use the brush to blend it in using circular motions. This will give you a smooth and flawless base.
2. Beauty Blender
The beauty blender is a versatile tool that can be used for applying foundation, concealer, and even powder. It has a unique shape that allows for precise application and blending. To use it, dampen the sponge and then use a bouncing motion to apply and blend the product onto your skin. This will give you a natural and airbrushed finish.
3. Powder Brush
The powder brush is a large, fluffy brush that is perfect for applying loose or pressed powder. It helps to set your foundation and concealer, giving you a matte finish. To use this brush, swirl it in the powder and then tap off any excess before gently sweeping it over your face.
4. Blush Brush
The blush brush has a tapered shape that is ideal for applying blush to the apples of your cheeks. To use this brush, smile and then apply the blush in a circular motion on the apples of your cheeks. This will give you a natural and flushed look.
5. Contour Brush
The contour brush has an angled shape that is perfect for creating definition and shadow on your face. To use this brush, dip it in a contour powder or cream and then apply it in the hollows of your cheeks, along your jawline, and on the sides of your nose. Blend it out for a natural and sculpted look.
6. Highlighter Brush
The highlighter brush has a fan-like shape that is perfect for applying highlighter to the high points of your face. To use this brush, dip it in your favorite highlighter and then lightly sweep it on your cheekbones, down the bridge of your nose, and on your cupid’s bow. This will give you a radiant and glowing look.
7. Eyeshadow Brush
The eyeshadow brush comes in various sizes and shapes, but the most common one is a flat, dense brush. It is perfect for packing on eyeshadow onto your eyelids. To use this brush, dip it in your eyeshadow and then pat it onto your eyelids. You can also use a fluffy blending brush to blend out any harsh lines.
8. Blending Brush
The blending brush has a fluffy and tapered shape that is perfect for blending out eyeshadow. To use this brush, dip it in a transition shade and then use windshield wiper motions to blend out any harsh lines. This will give you a seamless and well-blended eyeshadow look.
9. Angled Brush
The angled brush is a multi-purpose brush that can be used for filling in eyebrows, applying eyeliner, and even creating a winged eyeliner look. To use this brush, dip it in your favorite product and then use short and precise strokes to achieve your desired look.
10. Lip Brush
The lip brush has a small and pointed shape that is perfect for applying lipstick or lip gloss. To use this brush, dip it in your lip product and then use short and precise strokes to apply it onto your lips. This will give you a more precise and long-lasting application.
In conclusion, having the right makeup brushes and knowing how to use them correctly can make a significant difference in your makeup application. Investing in good quality brushes and regularly cleaning them will also ensure that they last longer and give you the best results. With these 10 essential makeup brushes and their proper usage, you can achieve a flawless and professional makeup look every time.


Bir Yorum